
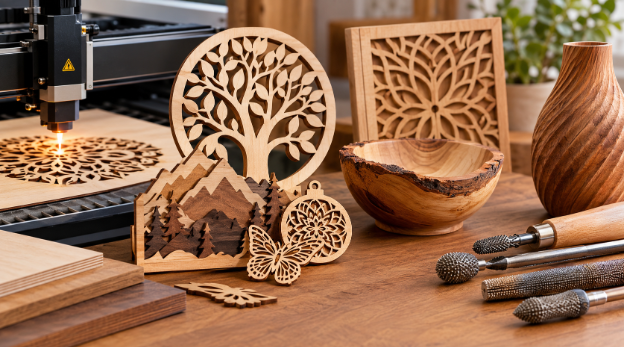
Wood has long been valued for its natural grain, warmth, and versatility, making it a popular material for decorative crafts and functional objects. Modern cutting technologies have expanded the possibilities for working with wood, allowing makers to produce intricate patterns, precise shapes, and repeatable designs. From personalized wall decorations to layered ornaments, laser cut wood art combines digital design with the natural character of timber, creating opportunities for both beginners and experienced craftspeople.
This technique uses a focused laser beam to cut or engrave designs into suitable wood materials. The result can range from simple geometric shapes to highly detailed illustrations, depending on the equipment, material, and settings used. Understanding wood selection, design preparation, finishing methods, and workshop safety helps artists achieve better results while reducing material waste.
What Is Laser Cut Wood Art?
Laser cut wood art is created by directing a concentrated beam of light onto a wooden surface to cut shapes, engrave details, or produce decorative patterns. A computer-controlled system follows a digital design, allowing makers to reproduce intricate elements with a high degree of consistency.
The process is suitable for many creative projects, including wall panels, lettering, decorative signs, jewelry, miniature models, ornaments, and layered artwork. Cutting depth and edge quality depend on the laser type, wood species, thickness, moisture content, and machine settings.
Laser cutting is different from traditional sawing because it uses heat rather than a physical blade to separate the material. This makes it possible to create fine internal details and narrow openings that may be difficult to achieve with conventional tools. However, the edges can darken during cutting, and some materials may scorch if the settings are unsuitable.
Choosing the Right Wood for Laser Cutting
Material selection has a major influence on the appearance, strength, and consistency of a finished project. Different wood products respond differently to laser energy, so testing a small sample before cutting the final design is advisable.
Plywood is popular for decorative projects because it is available in flat sheets and different thicknesses. However, the adhesives and internal layers can affect cutting quality, so laser-compatible plywood should be selected.
MDF provides a relatively uniform surface without prominent natural grain. It can be useful for lettering and decorative components, although its composition and potential emissions require particular attention to material suitability and ventilation.
Solid wood offers distinctive grain patterns that add character to finished pieces. Basswood is often used for craft projects because it is relatively easy to work with, while hardwoods can provide a more substantial appearance. Grain variation and density may produce inconsistent cutting results.
Acrylic and mixed materials can introduce additional design possibilities, but they require equipment and settings appropriate to the specific material. Never cut unknown plastics or materials that may release hazardous fumes.
For successful laser cut wood art, choose materials that are compatible with the machine, inspect them for warping, and confirm that their thickness falls within the equipment’s capabilities.
Essential Design Techniques for Better Results
A successful design begins with a digital file that matches the intended finished object. Vector graphics are commonly used for cutting outlines because they define shapes through paths rather than fixed pixels. Raster images, by comparison, are often used for engraving photographs, shaded artwork, and detailed illustrations.
Before starting a project, consider these techniques:
- Use appropriate line settings: Cutting paths and engraving areas may require different settings in the design software.
- Account for kerf: The laser removes a small amount of material along the cutting path. This kerf can affect the fit of interlocking pieces and small components.
- Avoid overly delicate details: Extremely thin sections can break during handling, particularly in thin plywood or brittle materials.
- Arrange components efficiently: Nesting shapes closely within a sheet can reduce offcuts and improve material utilization.
- Test small samples: Trial cuts help establish suitable power, speed, and focus settings before committing to a complete design.
Good file preparation also involves checking for duplicate lines, open paths, and overlapping shapes. These errors can cause repeated cutting passes, unnecessary scorching, or incomplete components.
Combining Laser Cutting With Traditional Woodworking
Digital cutting does not eliminate the value of traditional woodworking skills. Many artists combine laser-cut components with sanding, carving, staining, painting, assembly, and hand finishing to produce distinctive pieces.
For example, a layered wall decoration might begin with a laser-cut outline, followed by hand-applied color and carefully assembled wooden layers. Decorative boxes can incorporate precisely cut joints, while sculptural pieces may combine flat-cut elements with turned or carved components.
This combination of methods allows makers to use digital precision where it is most helpful while retaining the individual character that makes handmade work appealing.
Finishing and Protecting Wooden Artwork
Finishing improves the appearance of wood and can help protect it from everyday wear. Before applying a finish, inspect the cut edges for loose fibers, soot, or scorch marks. Light sanding may improve the surface, but avoid removing fine details from delicate components.
The choice of finish depends on the intended use. Clear finishes can emphasize natural grain, while stains alter color without necessarily concealing the wood’s texture. Paint provides broader color options, particularly for decorative signs and contemporary designs.
Always remove dust before finishing and follow the product manufacturer’s instructions for ventilation, drying times, and safe handling. If adhesive is needed to assemble layers, select one compatible with the materials and intended environment.
For artwork displayed outdoors, consider moisture exposure, ultraviolet light, temperature changes, and the protective properties of the selected coating. Not every wood product or finish is suitable for prolonged outdoor use.
Safety Considerations When Working With Lasers
Laser cutting requires appropriate safeguards because the equipment can cause eye injuries, burns, fires, and exposure to hazardous fumes. Use a properly enclosed machine with suitable protective interlocks and extraction systems. Never leave an operating laser unattended, and keep combustible materials away from the cutting area.
Material identification is essential. Some plastics, coated products, and chemically treated materials can release dangerous substances when heated. Follow the machine manufacturer’s approved material guidance, maintain adequate ventilation, and keep suitable fire-safety equipment accessible.
Traditional woodworking also produces dust and sharp offcuts, so use appropriate dust extraction and personal protective equipment for each task.
Conclusion
Creating detailed wooden decorations combines thoughtful design, suitable material selection, careful machine setup, and a well-planned finishing process. Understanding grain direction, cutting tolerances, and material behavior helps artists produce more consistent results while reducing waste and avoiding unnecessary mistakes. When exploring new approaches, woodturning texture tools can complement digital cutting methods by introducing tactile surface patterns and handcrafted details. Combining these techniques with careful finishing and safe workshop practices makes it possible to create distinctive pieces for home décor, gifts, and artistic projects. With practice and experimentation, laser cut wood art offers a versatile way to turn digital concepts into precise, visually appealing wooden creations.