
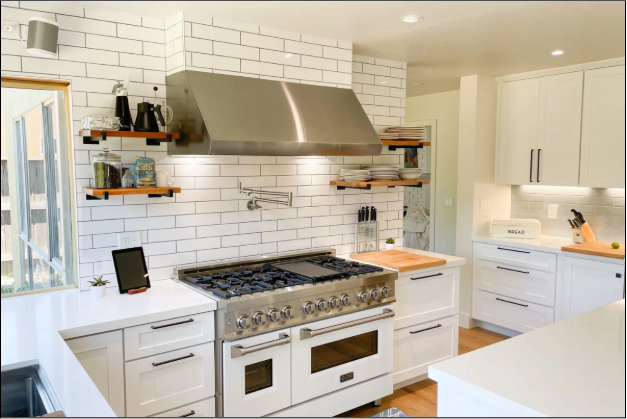
Large kitchens often feature wide cooking ranges designed for preparing several dishes at once. These appliances can produce significant amounts of heat, smoke, grease, and steam, making effective ventilation an important part of kitchen planning. A 60 in vent hood can provide broad coverage for an oversized cooking surface while creating a balanced focal point in a spacious kitchen.
Selecting the right hood requires more than matching its width to the range. Homeowners must also consider airflow capacity, ductwork, installation clearances, noise, and the route used to exhaust air outdoors. Careful planning helps ensure that the ventilation system works efficiently and complements the kitchen layout.
1. Match Hood Width to the Cooking Appliance
The first step is measuring the cooking range and the available installation area. A hood should generally be at least as wide as the cooking surface, although the manufacturer’s specifications and the appliance configuration determine the final requirements.
A 60 in vent hood may be appropriate for a large range with multiple burners or a wide professional-style cooking setup. Its capture area should also extend sufficiently over the cooking surface, since width alone does not guarantee that smoke and grease will be captured effectively.
Measure the surrounding cabinets, backsplash, ceiling height, and mounting area before purchasing a unit. These details help prevent installation conflicts and create a more cohesive appearance.
2. Determine the Required Airflow
Range hood airflow is commonly measured in cubic feet per minute (CFM). The appropriate capacity depends on the cooking appliance, heat output, cooking habits, and ventilation configuration.
Frequent high-heat cooking, searing, and frying may generate more airborne grease and smoke than light everyday cooking. When comparing a 60 in vent hood with other options, review the manufacturer’s airflow recommendations for the specific range.
Higher CFM does not automatically mean better performance in every kitchen. Duct size, duct length, bends, and exterior termination all influence the amount of air the system can move. A well-designed exhaust route helps the fan operate as intended.
3. Plan the Duct Route Before Installation
A ducted range hood removes contaminated air from the kitchen and carries it outdoors. Planning the route in advance can help avoid unnecessary bends, long runs, and restrictive transitions that reduce airflow.
The duct diameter should follow the hood manufacturer’s specifications. Reducing the duct size without approval can increase resistance and affect performance.
The exterior termination point also matters. A suitable wall cap or roof cap helps protect the duct from weather and limits unwanted outdoor air, pests, and debris from entering. The termination must be compatible with the duct dimensions and the hood’s installation requirements.
For a large 60 in vent hood, coordinating the fan, ductwork, and exterior cap is essential to creating an effective ventilation system.
4. Choose a Suitable Roof Cap
When a duct exits through the roof, the roof cap becomes an important part of the ventilation system. It should be designed for exhaust applications, compatible with the duct size, and suitable for the roof’s construction and weather exposure.
The roof penetration must also be properly flashed and sealed to reduce the risk of water intrusion. Avoid placing the termination where exhaust could be drawn into nearby windows or air intakes. A qualified installer can help confirm local requirements and select an appropriate termination.
5. Consider Noise and Daily Convenience
Large ventilation systems can produce noticeable sound, particularly at higher fan speeds. Compare noise ratings at different settings and consider whether the hood offers several operating speeds for different cooking tasks.
Lighting, accessible controls, and easy-to-remove filters can also improve everyday usability. These features make it easier to adjust ventilation while cooking and maintain the appliance over time.
6. Keep Filters and Components Clean
Grease filters capture airborne residue before it enters the ventilation system. They need regular cleaning, with frequency determined by cooking habits and the manufacturer’s recommendations. Some filters can be washed in a dishwasher, while others require specific cleaning methods.
Clean the hood’s exterior with suitable products and inspect accessible components periodically. If airflow decreases or the fan develops unusual noises, investigate the issue rather than relying on higher settings to compensate.
Consistent maintenance helps a 60 in vent hood continue operating effectively and supports a cleaner cooking environment.
Conclusion
Choosing a 60 in vent hood involves balancing coverage, airflow, duct design, exterior termination, noise, and maintenance. Measure the cooking area carefully, follow manufacturer recommendations, and plan the complete exhaust route before installation. A compatible roof cap and properly installed ductwork are just as important as the hood itself. Homeowners researching which roof cap they can use for their vent hood should compare the cap’s dimensions, airflow characteristics, weather protection, and compatibility with the selected hood. A roof cap intended for a different application may not provide the right fit or performance. By considering these details together, homeowners can create a kitchen ventilation system that supports demanding cooking tasks while fitting naturally into the overall design.