[ad_1]
A factory restore returns your MacBook or iMac to its original state (when you first purchased the device). There might be a few reasons why you want or need to do this, such as the machine isn’t running as well as it once did or you’re planning on selling the laptop or desktop. No matter the reason, there might come a time when a factory reset is your best option.
But how do you pull off such a feat? Is it something only the computer savvy should attempt? Believe it or not, Apple has actually made this process fairly painless — especially if you’re running macOS Monterey on M1-based hardware. I will show you how to do a factory reset on macOS Monterey, with both Intel and M1 (Apple Silicon) based hardware.
This process will delete all of your data.
So if you have important files on your laptop or desktop, make sure to first back them up to an external drive or cloud account before moving forward with this process. With that said, let’s restore.
Restoring on M1-based hardware
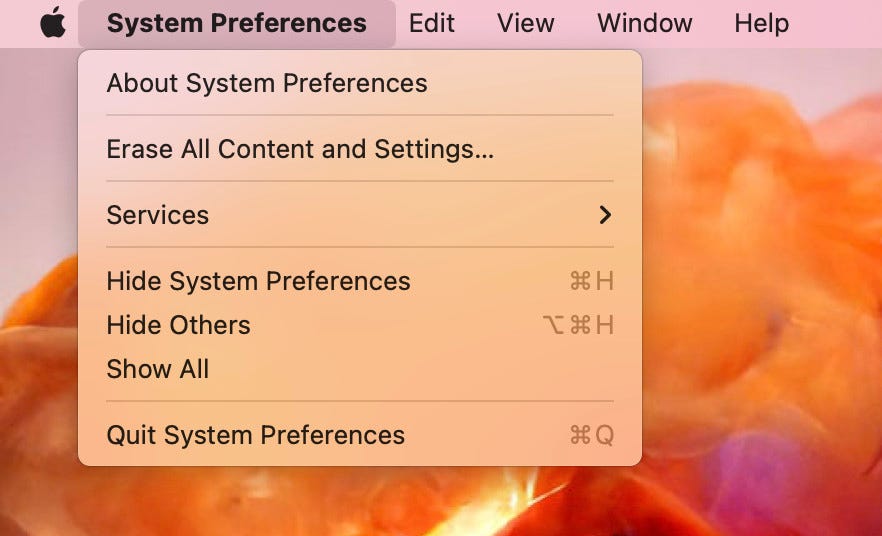
Apple has made it incredibly easy to do a factory restore with macOS Monterey running on M1-based devices. To do this, make sure your device is plugged in (you don’t want to trust this to your battery), click the Apple button in the top left corner of your screen, and then click System Preferences. Once System Preferences is open, click the System Preferences menu in the top bar and then click Erase All Content and Settings (Figure 1).
Figure 1

Doing a factory reset on macOS Monterey from an M1-based MacBook Pro.
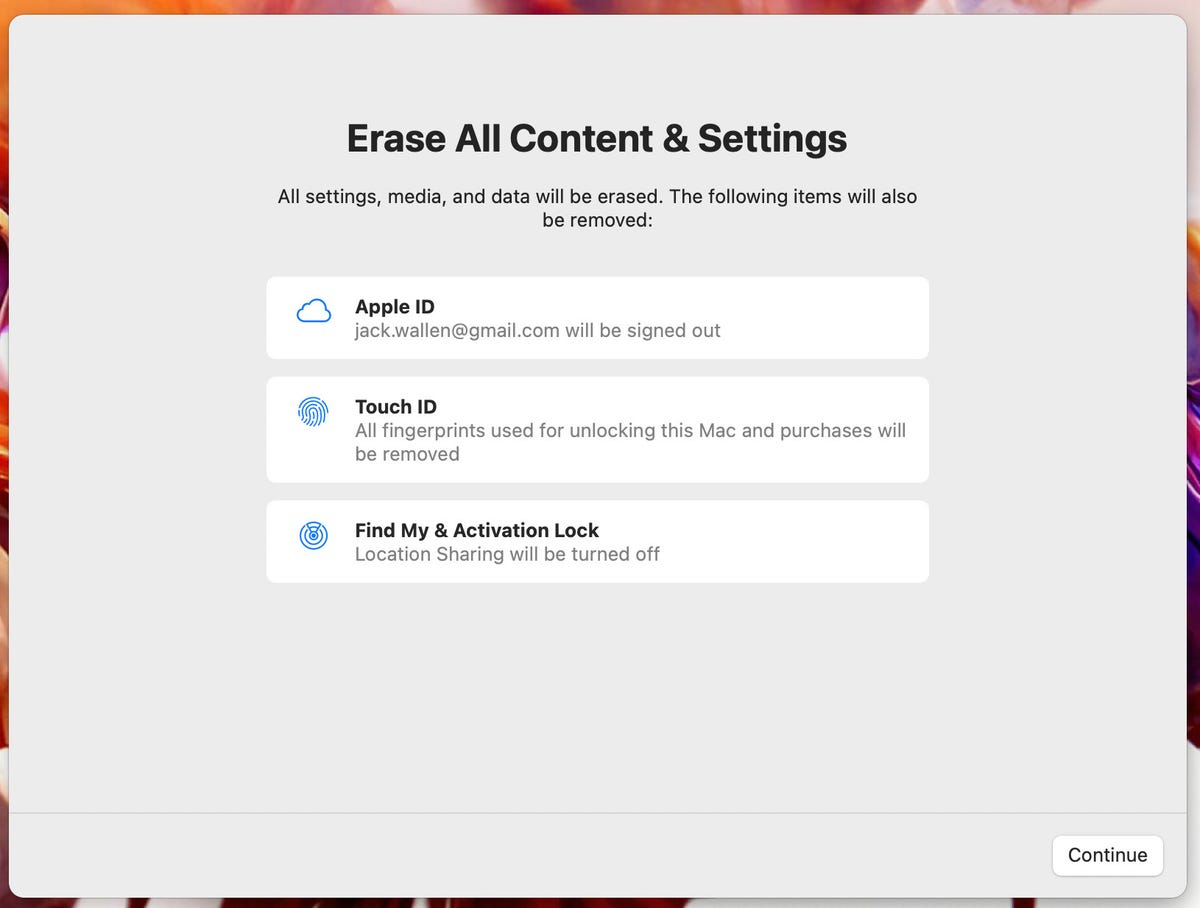
You will be prompted to type your user password and then click OK. The resulting popup (Figure 2) informs you of everything that will be done.
Figure 2

Are you ready to erase everything from macOS?
If you’re certain you want to proceed, click Continue and the process will begin. Your device will restart a few times and will eventually land on the familiar “Hello” screen, where you can then walk through the setup process. After you complete this, your device will be as clean as it was when you first bought it.
Restoring on Intel-based hardware
This process isn’t nearly as easy because there isn’t a GUI tool to take care of it for you. Instead, we have to do this the old-school manual way. Here are the steps:
If you plan on selling your Apple device, you’ll want to first sign out of iCloud and iMessage. To sign out of iMessage, open the app and then click Messages > Preferences. Then switch to the iMessage tab and select Sign Out. For iCloud, open System Preferences and then click Apple ID. Click the iCloud tab and then click Sign Out.
Restart your computer by clicking the Apple button and then Restart.
As the device restarts, hold down the Command and R keys.
When the Apple logo appears, release the Command and R keys.
You will be prompted to select a user with a password and then click Next.
Type the user password.
When the Recovery Mode menu appears, select Disk Utility.
Select the Macintosh HD startup disk and select Erase.
When the next pop-up window appears, make sure the Format is set to APFS and click Erase again.
When the formatting completes, click Done.
Click Disk Utility > Quit Disk Utility.
Click Reinstall macOS Monterey, and then click Continue.
Click Continue again.
When prompted, agree to the EULA by clicking Agree.
Click Agree again.
Select Macintosh HD and click Continue.
Allow the installation to complete (it can take two to four hours).
When the installation completes, you can then walk through the signup process as if the device was just purchased.
Congratulations, your macOS device should be like new.
[ad_2]
Source link


