

[ad_1]

As software moves from ‘big bang’ releases every few years to subscription models and automatic updates, new features arrive faster. CorelDRAW Graphics Suite has been offering annual releases, but subscribers (and customers who have perpetual licences with active maintenance) are now getting exclusive new features every six months.
The March 2022 Subscriber Update includes some minor but useful options, including handy new functionality for working with multi-page layouts, easier ways to see design elements that have been shared with you through the Corel cloud, more export options and personalised contextual help to get you up to speed with all the features.
There are also major improvements to photo editing, with new controls to simplify a range of adjustments that are now non-destructive and all have live previews, so you can easily try out effects to see what works without having to worry about edits that can’t be undone. That’s particularly useful for graphic designers who may use a variety of techniques to tweak photos to fit in with a design, especially as you can save a set of adjustments to reuse on other images.
Like
- Image adjustments offer fine control and automatic options
- Small but helpful improvements to production workflows
- Update shared assets easily without losing control
Don’t Like
- Only for subscribers
- Personalised learning doesn’t seem very personalised
- Powerful features can be rather hidden as tiny buttons
Image editing tools in PHOTO-PAINT have been moving into the Adjustment Docker in recent versions (the same tools are available inside CorelDRAW, but from the Effects menu rather than in a Docker). This is now faster and easier to use, with hints like colour-coding the different ends of the white balance colour temperature and tint sliders, so you can see that dragging left makes the colours warmer in a way that just seeing the temperature in Kelvins doesn’t make obvious.
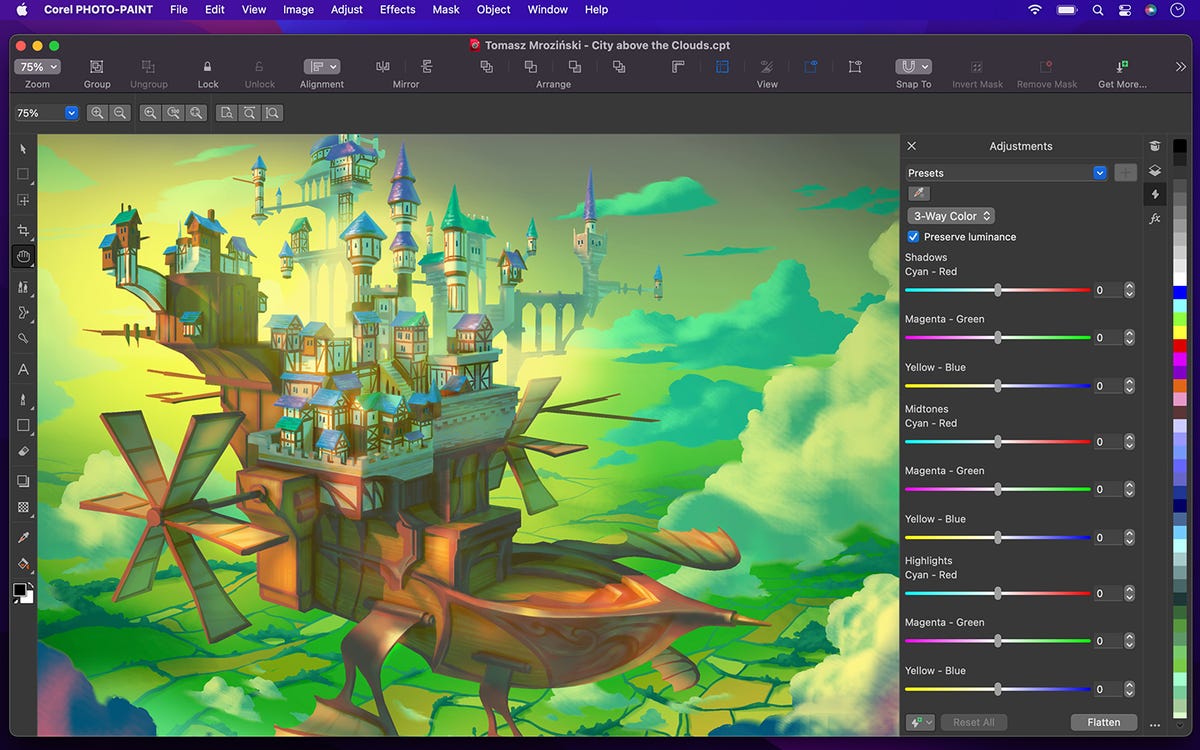
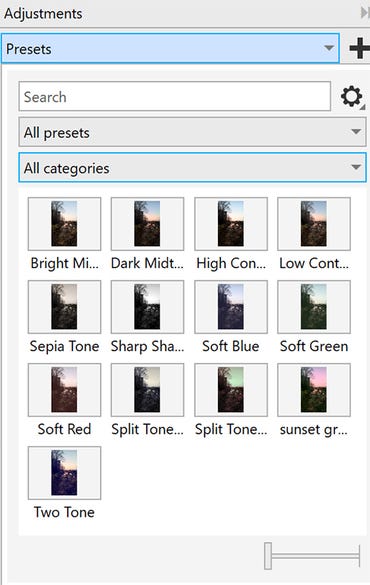
CorelPHOTO-PAINT for Mac: the Image Adjustments Docker.
Image: Corel
The Adjustment Docker only shows the histogram, white balance and light tools by default, but you can add another 12 tools including the new Black & White adjustment that lets you choose how different colours in the image will behave when converted to monochrome. If you’re losing detail in an area of the photo, adjusting how the predominant colour in that area is treated can restore detail, or you can split the tone to treat shadows and highlights differently.
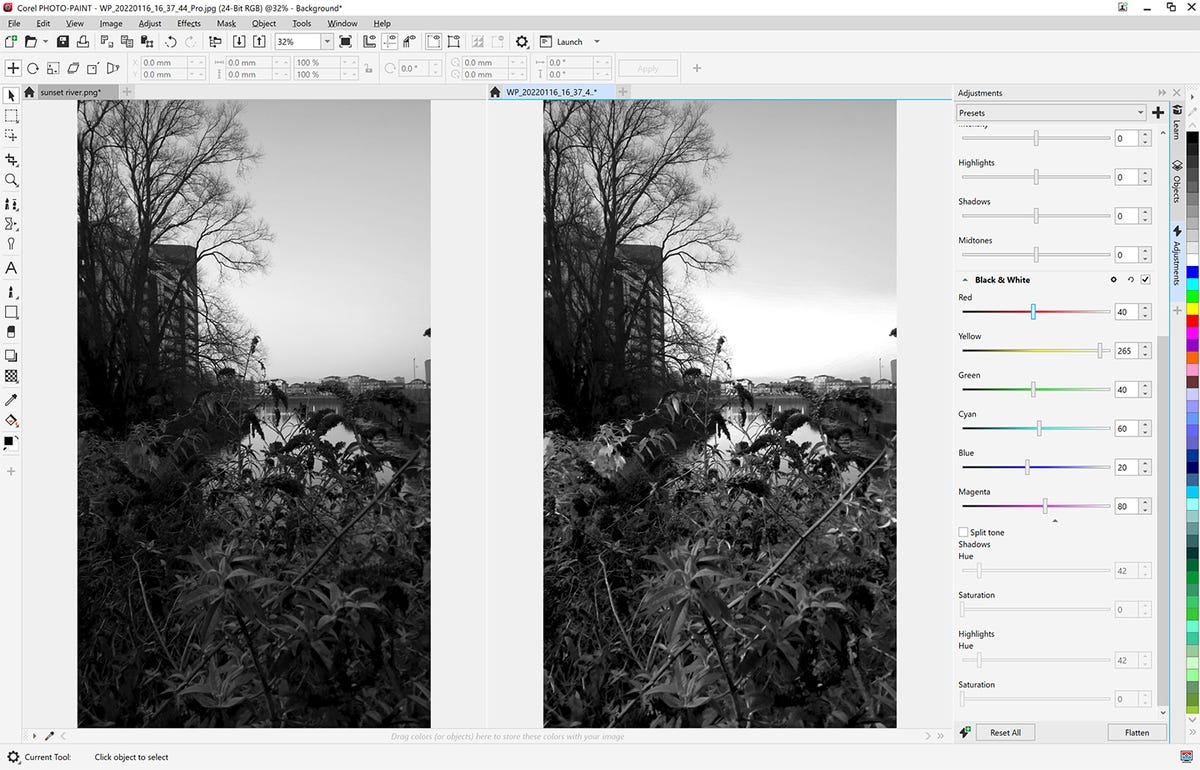
Adjusting the way yellow is treated in this black-and-white conversion in the photo on the right gives you more control over the end result.
Image: Mary Branscombe / ZDNet
The new Colour Balance adjustment lets you adjust shadows, midtones and highlights, with three colour-coded sliders for each, so you can make a sunset sky pinker and the green leaves in the shadows greener without needing to create masks. Or if you want to take out the colour tint caused by extreme lighting, you can use the eyedropper to pick an area in the image that’s supposed to have a neutral colour (sea foam, pale stone or a white wall) to have the colours adjusted across the image and then tweak shadows, midtones or highlights individually.
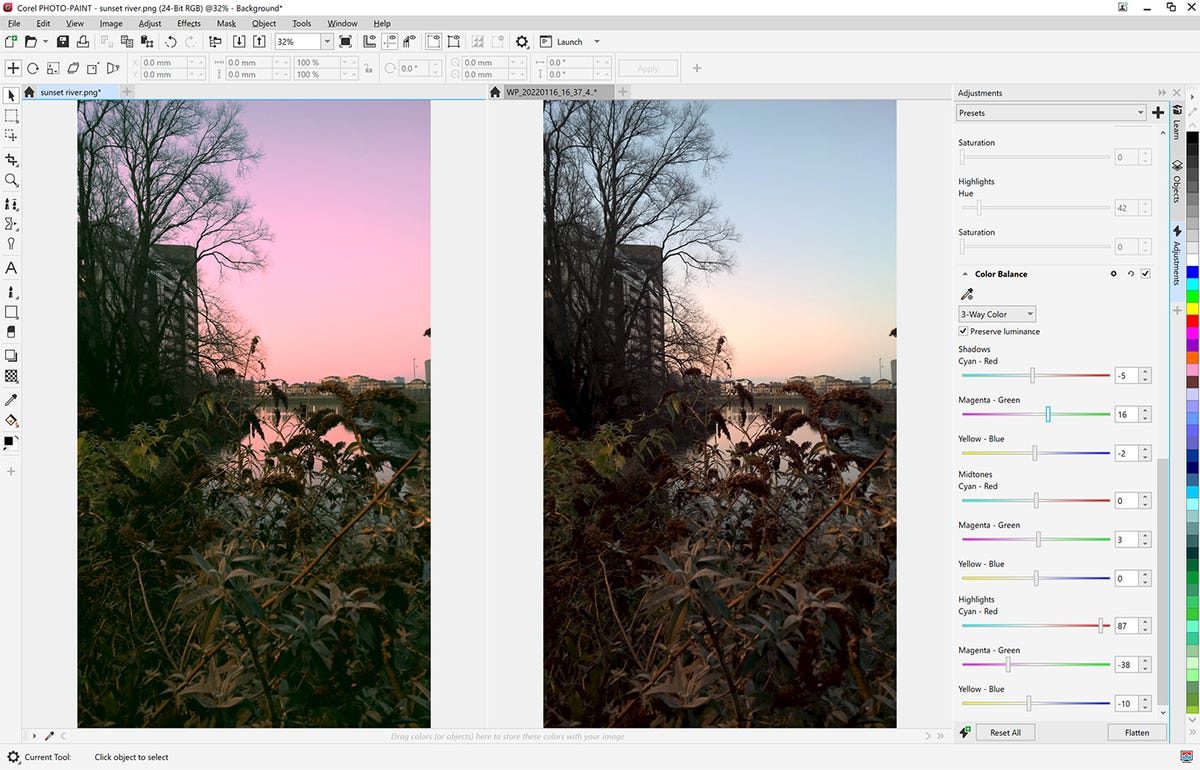
The three-way Colour Balance adjustments allow the sunset to be made pinker and the leaves in shadow greener.
Image: Mary Branscombe / ZDNet
You can save a set of image editing adjustments as a preset to reuse in PHOTO-PAINT or CorelDRAW.
Image: Mary Branscombe / ZDNet
Adjusting the tone curves for an image let you make very precise adjustments to colour and brightness, but this is often hard to get to grips with. The new Tone Curve adjustment has an automatic option that’s hidden away as a tiny button next to the option and reset controls. If that doesn’t get the result you want, you can use the sampling tool on the image to pick the points on the curve to adjust (or just click on the curve). There’s an automatic adjustment in the new Levels tool as well, and an auto desaturate tool (although that’s easier to find in the Adjust menu than in the Docker).
If you’ve made multiple adjustments to an image and you want to reuse them, you can copy them (again using the Adjust menu rather than the Docker) and apply them to another image. But if you’re editing multiple photos that you’re going to use in a brochure, photobook or a range of packaging and they all need to have the same look, you can save the adjustments as your own preset — which you can then use in CorelDRAW as well as in PHOTO-PAINT. The preset is saved as a CorelDRAW stylesheet file that you can share with colleagues working on the same project (it’s not yet something you can share through Corel’s cloud service, but that might come in future). That makes it easier to get consistency across a large project, but individual designers can still tweak and undo those adjustments because they’re non-destructive.
Workflow productivity
Other new features are less showy but improve the often-tedious processes of production that take up much of a designer or illustrator’s time.
Multi-page projects in CorelDRAW might be brochures or they might collect different assets like web ads and banners alongside posters and packaging. If you’re doing DTP, CorelDRAW now understands facing pages and spreads, so if you insert a new page in the middle of the layout you get a double-page spread to keep the page layout consistent, rather than a single page that would mess up the printing.
If you’re using multiple pages to bring assets together, they won’t all have the same page size. There’s a new thumbnail view to make it easier to navigate through that kind of layout. As you place new pages on the canvas you can copy or drag and drop elements from other pages, you can also now drag to change the size of the new page as if it was any other kind of object.
With a multi-page collection of assets, the Export Docker is a good way to manage output: you can set which pages need to be saved as GIFs or PNGs for online use and which as PDF for printing. That now includes SVG for logos, as well as EPS and TIFF for high-resolution printing (and new options for selecting multiple assets if you want to change the file format you’re exporting them in).
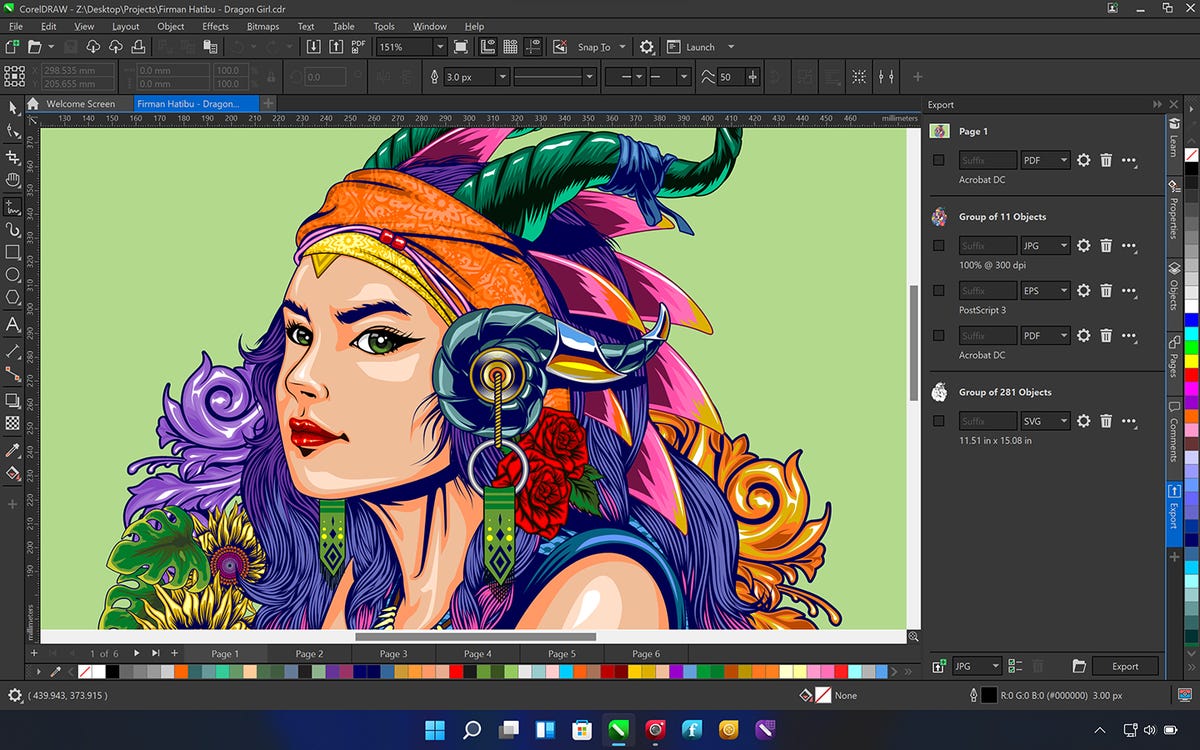
Multi-asset export in CorelDRAW.
Image: Corel
The October 2021 updated added an Asset Docker showing files, libraries and design elements you have access to in the Corel cloud, including ones shared with you. That could get overwhelming on large projects, so there’s now a list view, an edit button for opening files you own directly and a summary of where you’ve used a shared asset in a file.
If another designer is creating the logo for a project you’re working on, accessing it through a symbol library rather than copying and pasting it means you can be consistent if the logo gets updated partway through. You’ll see a red dot in the library to let you know the logo has changed, but it won’t be automatically applied to your layout. You can open the asset and see what’s different so you know whether you need to make any changes to the rest of the design (if the logo used to be square and is now an oval, or the colour has changed from purple to orange, for example). You can choose when to update to the new version of the symbol, but for consistency, when you do update that will change all the instances of the symbol in your document.
Personalised search results for tools and training can help you use new and existing tools.
Image: Mary Branscombe / ZDNet
Several of these new tools simplify working with CorelDRAW, but it’s still a powerful package and it can be challenging to get to grips with. The Learn Docker lets you search for both tools and training materials: as documentation and training videos still open in the browser, the timesaver is seeing which menu or Docker particular commands are on (although unlike the similar feature in Microsoft Office, you can’t click on the results to open the tool).
Corel tells us the results are personalised based on both what you’re working on, and the experience level and kind of projects you tell CorelDRAW and PHOTO-PAINT you work on, although we didn’t notice much difference in the results when picking different levels or project types. The search is also very broad: looking for ‘white balance’ shows you where to find the relevant tool, but also suggests training material on converting to black-and-white or removing white fringes.
As software moves to these faster releases with smaller sets of features, feedback becomes more important (for getting the right features and for making iterative improvements like the tweaks to exporting assets). While the CorelDRAW community has always been fairly vocal and several of the improvements here come from requests, there’s now a public feedback site where users can suggest features and upvote existing suggestions.
The subscription licence is also a little more flexible. Instead of picking a Windows or Mac licence, you now get a hybrid licence that lets you install on either OS; you can also install on a secondary device (which can be on the same OS or mixing Mac and Windows), as long as you’re only using one device at one time. That’s particularly helpful for hybrid and remote work, if your home system isn’t the same as what you use in the office.
With that flexibility and the more frequent updates, the subscription pricing looks increasingly attractive, at £319/$269/€369 per year (compared to £659/$549/ €779 for a one-time purchase of CorelDRAW Graphics Suite 2021, which goes up to £782 with the maintenance that delivers ongoing feature updates as well as access to the cloud and web features).
Conclusions
CorelDRAW Graphics Suite isn’t aimed at casual users, even though some of the tools are straightforward and deliver fast results. Instead, this is a collection of powerful tools aimed at illustration and design professionals that continues to add both minor and major improvements aimed at productivity and collaborative design processes. The subscription approach makes sense for long-term users, who will find even the smaller improvements in these regular updates worth the investment. The flexibility over which OS you use is also welcome.
Alternatives to consider
There are plenty of alternative vector-based drawing packages to CorelDRAW, the main one being Adobe Illustrator, which costs slightly less as an annual subscription but doesn’t offer a one-time purchase option. Serif’s Affinity Designer is a popular option at the affordable end of the market, and there’s a range of free apps, headed by the open-source Inkscape.
RECENT AND RELATED CONTENT
CorelDRAW Graphics Suite 2021 review: Improved collaboration tools and streamlined workflows
CorelDRAW Technical Suite 2020: A complete set of tools for technical illustrators
Corel Painter 2022, hands on: Enhanced usability takes centre stage
CorelDRAW Graphics Suite 2020 review: Faster, with more AI and added collaboration
Adobe Illustrator on the iPad, hands on: A useful tool for experienced designers
Read more reviews
[ad_2]
Source link